
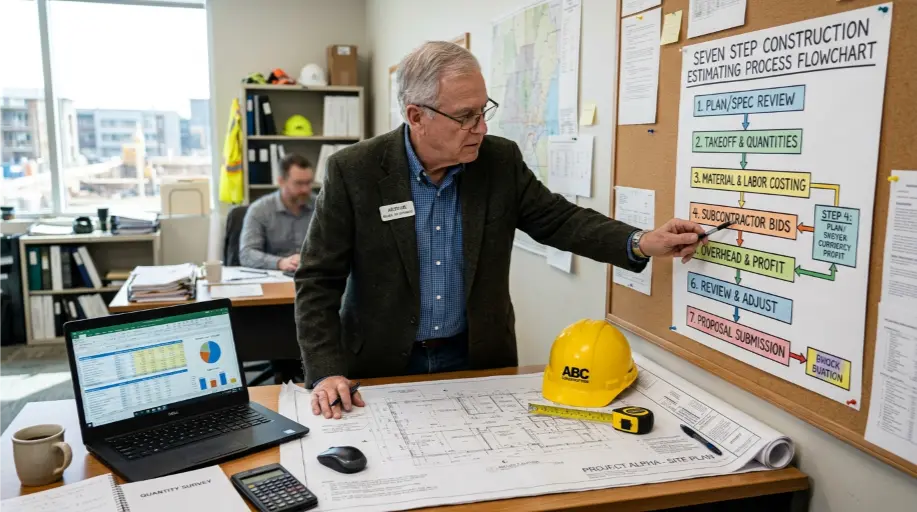
Construction estimating works by turning drawings and specs into a priced list of every task, material, and hour needed to build a project. The estimator reviews the bid documents, runs a quantity takeoff, applies current labor and material costs, folds in subcontractor quotes, adds overhead and profit, then compiles the whole thing into a structured bid or budget.
In the US market, this process decides whether a general contractor or subcontractor wins work at a price that actually makes money. Miss a scope item, underprice labor, or skip contingency, and a job can be losing money before the first shovel hits the ground.
Why the Estimating Process Matters for US Contractors
In 2026, US construction is dealing with tight labor markets, volatile material prices, and compliance rules on public works that only get more complicated. A disciplined estimating process isn’t back office paperwork nobody reads. It’s a risk management tool. It prevents scope gaps that turn into change order fights later, keeps your bid aligned with current regional labor rates and RSMeans benchmarks, builds in contingency for unknowns without pricing you out of the job entirely, and gives project managers a clear baseline to track cost to complete once work starts.
General contractors who treat estimating as a repeatable workflow win more consistent margins than the ones who wing it job to job. That’s not a slogan, it’s just what happens when the same process gets run the same way every time.
The Seven Step Construction Estimating Process
Professional estimators don’t jump straight to pricing. They follow a structured sequence built to catch errors before they turn into rework. Here’s the step by step process used by US GCs and estimating firms.
Step 1. Scope and Document Review
Every estimate starts with a full read through of the bid package. That means architectural, structural, and MEP drawings, the project specifications (often well past 100 pages), addenda, RFIs, geotechnical reports, and the bid forms with their alternates and unit price items.
The estimator reads every section before measuring anything at all. This is where a lot of mistakes actually happen. Price from incomplete documents and your numbers will be wrong no matter how clean your takeoff turns out.
A few questions worth asking at this stage. Are there conflicts between the drawings and the specs? Which alternates need pricing, and are they additive or deductive? Are there long lead items that will affect schedule and cash flow? Does the site have access, utility, or soil constraints that never made it onto the plans?
Step 2. Site Investigation When It Applies
For renovations, civil work, and plenty of commercial jobs, a site visit or a virtual walkthrough adds context you can’t get from paper. Existing conditions that differ from the as built drawings, access constraints for cranes and deliveries, utility conflicts and overhead clearances, and logistical issues that quietly drive up mobilization and equipment costs.
On remote projects, estimators often lean on photo documentation, drone footage, or a local superintendent to gather this intelligence without anyone getting on a plane.
Step 3. Quantity Takeoff by Trade
This is the actual core of estimating. The estimator measures or counts every buildable item and organizes it by trade or CSI MasterFormat division. Concrete gets broken into cubic yards of footings, slabs, and walls, plus formwork and rebar. Framing gets board feet of lumber, sheets of sheathing, linear feet of plates. Finishes cover square feet of drywall, paint, flooring, and ceiling tile. MEP covers fixtures, devices, duct runs, pipe lengths, and equipment counts.
Most estimators today measure directly from PDF plans using Planswift, Bluebeam, or On Screen Takeoff. Every line item ties back to a drawing detail or spec section, so the GC can actually defend the quantities if a negotiation gets tense.
The common units you’ll see across a takeoff are square feet for areas like flooring and roofing, cubic yards for concrete and excavation, linear feet for piping, conduit, and trim, and each for fixtures, doors, and equipment.
Step 4. Pricing Labor, Material, and Equipment
Once quantities are measured, the estimator applies costs. This is the step that separates amateurs from professionals, since anyone can measure a wall but pricing it correctly takes real judgment.
Material pricing should come from current vendor quotes first, then RSMeans or regional cost databases, then historical data adjusted for escalation if nothing more current is available. In 2026, sharp estimators add 3 to 8 percent escalation for projects starting 60 to 180 days out, especially on steel, copper, and lumber.
Labor pricing needs more than a base hourly wage. A real labor rate includes the base wage for that trade in that metro area, fringe benefits like health, pension, and training, payroll taxes covering Social Security, Medicare, and unemployment, workers compensation insurance, and productivity factors for site constraints or height work.
On public works, Davis Bacon prevailing wage determinations have to be applied by county and by trade. Miss those rates and you’re not looking at a rounding error, you’re looking at penalties and back pay claims.
Equipment costs cover rentals, fuel, and operator time, things like cranes, lifts, excavators, and generators, plus temp heat, cooling, or dewatering pumps when the job calls for it. Small tools and consumables usually get rolled into a flat percentage rather than itemized one by one.

Step 5. Subcontractor and Specialty Trade Pricing
General estimators rarely price complex MEP, fire suppression, or other specialty systems in house. Instead, they send bid packages out to qualified subs, collect multiple quotes per trade, level those bids by scope, exclusions, and qualifications, then plug the best value subcontractor price into the master estimate.
Bid leveling matters more than people give it credit for. The lowest number isn’t automatically the best one if it’s missing scope, using inferior materials, or leaving out something critical like testing and commissioning.
Step 6. Contingency, Overhead, and Profit
A number with no contingency built in isn’t a professional estimate. It’s a hope. Contingency shrinks as design certainty increases. A Class 5 conceptual estimate typically carries 20 to 30 percent contingency, Class 3 design development work runs 10 to 20 percent, and a Class 1 definitive estimate with 100 percent drawings tightens to 3 to 10 percent.
Overhead covers company level costs that aren’t tied to any single job, things like office rent, utilities, software subscriptions, and the salaries behind estimating, accounting, and management. Add marketing, insurance, and bonding fees on top of that.
Profit markup gets applied after overhead, and this is where a lot of contractors mix things up. Markup is a percentage added to cost. Margin is the profit percentage of the final price. A 10 percent margin actually requires roughly an 11.1 percent markup, which trips people up more often than you’d expect.
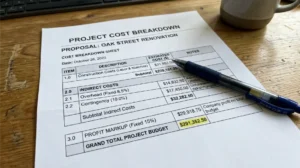
Here’s how that stacks up in practice. Direct costs for labor, material, equipment, and subs come to $1,000,000. Overhead at 5 percent adds $50,000, bringing the subtotal to $1,050,000. Profit markup at 10 percent adds $105,000. The final bid price lands at $1,155,000.
Step 7. Compilation, Review, and Submission
The final estimate rolls up into a structured document, usually organized by CSI MasterFormat division. Division 03 covers concrete, Division 05 covers metals, Division 06 covers wood, plastics, and composites, Division 07 covers thermal and moisture protection, Division 08 covers openings, Division 09 covers finishes, and Divisions 21 through 28 cover the full MEP block.
A second estimator or a senior reviewer checks the whole thing for data entry errors, duplicate line items, missing alternates or unit price items, and consistency between the takeoff and the pricing that got applied to it.
The finished bid package includes detailed quantity takeoff reports with drawing references, trade by trade cost breakdowns, clarifications, exclusions, and assumptions, alternate pricing and value engineering options, and a clear timeline for how long the estimate stays valid.

Estimate Types by Project Phase
Not every estimate is built to the same standard, and accuracy depends entirely on how much design information actually exists. The American Society of Professional Estimators and AACE International define the estimate classes that most US GCs use to set expectations with owners and lenders.
| Estimate Class | Design Complete | Typical Accuracy Range | When Used |
|---|---|---|---|
| Class 5, Order of Magnitude | 0 to 5 percent | Minus 20 percent to plus 50 percent | Early feasibility, rough budgets |
| Class 4, Preliminary | 1 to 15 percent | Minus 15 percent to plus 30 percent | Initial approvals, funding requests |
| Class 3, Conceptual | 10 to 40 percent | Minus 10 percent to plus 20 percent | Budget authorization, design development |
| Class 2, Substantive | 30 to 75 percent | Minus 5 percent to plus 15 percent | Contract bidding, procurement |
| Class 1, Definitive | 65 to 100 percent | Minus 3 percent to plus 10 percent | Final control budgets, check estimates |
As design moves forward, contingency shrinks and the estimate shifts from a budgeting tool into a firm bid baseline everyone can hold each other to.
Common Estimating Pitfalls and How to Avoid Them
Even experienced estimators fall into the same traps, and every one of them quietly eats into margin.
- Pricing before scope is locked. When RFIs are still flying and specs are still changing, your numbers will be stale by bid day. Lock scope in writing before final pricing happens.
- Using outdated cost data. RSMeans figures or vendor quotes from 12 months ago don’t reflect 2026 escalation. Always verify current pricing on steel, copper, lumber, and fuel.
- Ignoring productivity factors. A wall that takes 4 hours under ideal conditions might take 7 in a tight retrofit with limited access. Adjust labor hours to match real site constraints, not textbook ones.
- Underestimating indirects. Mobilization, temp utilities, cleanup, and safety can reach 12 to 18 percent of total cost on small jobs if nobody planned for them properly.
- Skipping the second review. A fresh set of eyes catches data entry errors, duplicate items, and missed alternates before the bid ever goes out the door.
Frequently Asked Questions
What are the steps in construction estimating?
The main steps are reviewing bid documents and defining scope, performing a quantity takeoff by trade, pricing labor and materials using current data, soliciting and leveling subcontractor bids, applying overhead and profit markup, and compiling the final estimate with clarifications and exclusions attached.
How do you calculate a construction estimate?
You calculate a construction estimate by measuring quantities from the drawings, multiplying each by its unit cost for labor, material, and equipment, adding in subcontractor quotes, then applying percentages for overhead, contingency, and profit. The sum of all that becomes your bid or budget price.
What is included in a construction estimate?
A professional estimate includes quantity takeoffs organized by trade or CSI division, material and labor costs, equipment rentals, subcontractor pricing, indirect costs like mobilization and cleanup, contingency for the unknowns, and a clear list of assumptions and exclusions the contractor still needs to account for.
How long does it take to prepare a construction estimate?
Turnaround depends on project size and how complete the design actually is. Single trade residential takeoffs can be done in 24 to 48 hours. Full commercial multi trade estimates typically take 3 to 7 business days, longer if the design is still moving underneath you.
What is the difference between an estimate and a bid?
An estimate is a calculated projection of project costs used for budgeting or internal planning. A bid is a formal offer to perform the work at a specific price, submitted to an owner or GC, and it’s often legally binding once it’s accepted.
Do I need a professional estimator for my project?
For small residential jobs, an experienced contractor can often estimate in house without much risk. For commercial, multi trade, or public works projects, a professional estimator reduces risk by making sure the scope is complete, the pricing is current, and contingency and overhead are calculated properly rather than guessed at.
What software do construction estimators use?
Leading US estimators use Planswift, Bluebeam, and On Screen Takeoff for digital takeoffs, Excel or specialized platforms for cost buildup, and RSMeans or regional databases for unit pricing. Some also integrate with Procore, BuildHawk, or HeavyBid to fit into a GC’s existing workflow.

Turn Your Plans Into a Structured Estimate
If you want a repeatable, field tested estimating process without hiring a full time estimator, Digital Estimating LLC provides outsourced quantity takeoffs, preliminary budgets, and bid ready submittals for GCs and subs across the United States.
Send over your current bid package, drawings, specs, and addenda, for a no obligation review, and tell us your bid date and target divisions so we can assign the right specialist, whether that’s concrete, framing, MEP, or a full GC package.
If you want to see our structure before committing to anything, request a sample takeoff and we’ll show you the CSI MasterFormat layout and drawing references we work from. And if you’ve got a lost or marginal bid sitting around, send that over too. We’ll walk through it and show you exactly where scope, labor, or indirects may have been underpriced.
For more on how each piece of this fits together, our Construction Estimating Services Guide covers the process end to end.
If you want a deeper look at estimate classes and accuracy ranges, our Types of Construction Estimates Explained page breaks that down in more detail than the table above.
And if you’re ready to see what fits your specific project, our full range of services lays out every option from a single trade takeoff to a complete bid ready package.

[…] by project type, location, customer, estimator, contract size, and delivery method. Understanding how construction estimating works can help identify where repeated bid losses […]
[…] is only one line in the wider construction estimating process. Begin with the employee and the task. Ascertain the trade, type, experience level, site location, […]